Improv Leaders & Enders

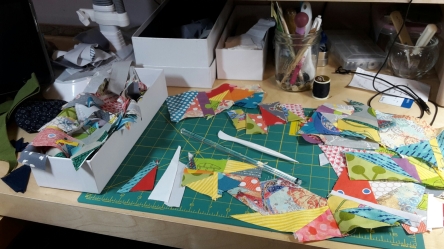
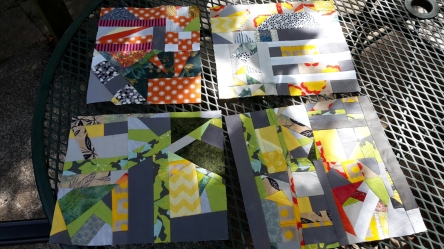
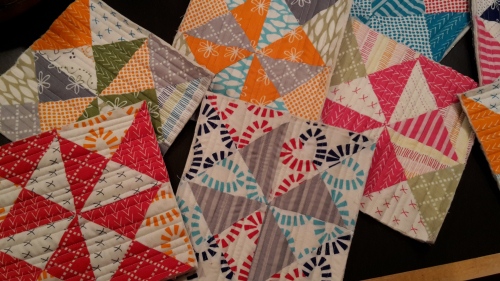
These improv mini-quilts are the result of using the scraps leftover from individual quilt projects as leaders and enders, aka thread bunnies. When a project is complete,  I throw the scraps that are too small to return to my folded storage into a box and put it near my machine.   I grab two and use them as a thread bunny.  I keep building the pieces into larger pieces creating what I’ve heard called ‘found fabric’.   

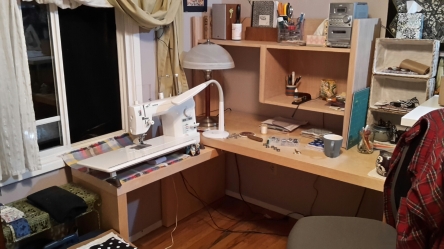
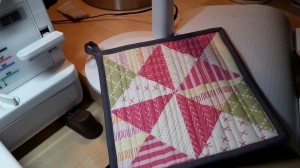
Here is a photo of my work space at the point when I’ve started to turn the ‘found fabric’ into a cohesive mini quilt.  

I loved Bonnie Hunter’s idea for cutting her scraps into a system of squares then matching light and dark shapes together to eventually create a whole quilt.   So clever!  And I tried cutting my scraps up, but I find I’m not quite disciplined enough.  I just want to start sewing!   I attended an improv piecing class taught by Kristin Shields a couple of years ago,  and I’ve heard friends talk about playing with fabric.  And this spring my lazy brain put it all together to create improv leaders and enders.  

My plan for these minis is to make potholders as I don’t particularly consider them works of art. But they are fun.  They are using up my scraps.  And I am creating something useful.  So there are several ‘wins’. 

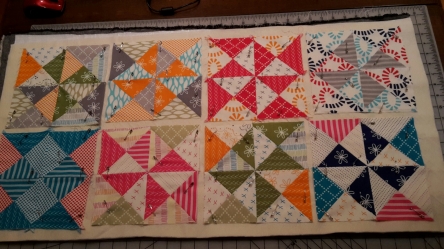
Here is another set made from leftovers of two blue projects.  I just finished the last of these scraps. 

What I’ve Learned:  So far I haven’t done much sorting of the scraps before I start sewing,  but I think that sorting by general size or shape might be a good idea for the batch I’m working with now – lots of triangle shapes. 

This takes longer than working with a disposable thread bunny.  So I have to remind myself that I’m actually getting two projects done at once.   Last year I made 26 potholders before the holidays, and I’ve got a good jump on that this year. 

Thread Basket

Do you waste a lot of time picking pieces of thread and lint off of your fabric – only to somehow find it back on the fabric a few minutes later?  This was my story.   😦

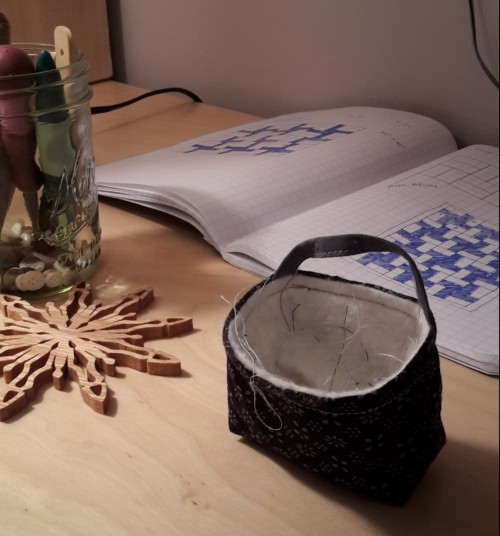
Threadcatchers that hang near your machine are great, but I was gathering these threads at the sewing machine – and at the cutting board, the ironing board, and the design wall!  Last week I had a small epiphany and decided that a little bag, lined with batting, would do the trick, especially if I pinned it directly to me!  This way, it’s always handy – whether I’m at the sewing machine, the cutting board, or the ironing board.  The threads cling to the batting where they wait till I’m ready to empty the basket.  I can easily scoop out a thread ball and toss it into my garbage pail.  I don’t have to worry about cleaning out the basket thoroughly – those threads aren’t going anywhere.

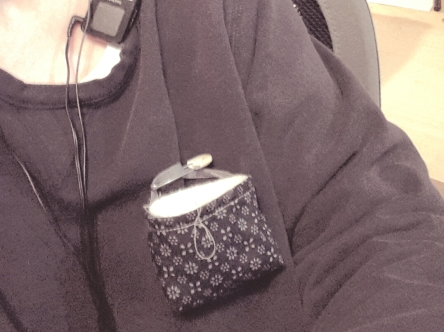
Here is a photo of me wearing my thread basket. I'm using a 24 year old diaper pin, but I'm sure there are cuter pins out there.

Here is a photo of me wearing my thread basket. I’m using a 24 year old diaper pin, but I’m sure there are cuter pins out there.

One thing I will change if I make another will be to use flannel lining rather than batting.  The batting is a bit bulky and almost too ‘sticky’.

Also, I have a vague memory that I may have seen something like this at a quilt retreat a few years ago.  In which case, why didn’t I make one sooner!  😦  I’ve been using it for a week now, and it’s working great.  If I forget to pin it on when I enter my sewing room, I miss it right away.

Sewing Room redux

I might like being in my sewing room even more than I like sewing.   Sometimes I just sit in there, particularly after I’ve tidied up, and I gloat.   It’s tiny, but it is all mine.   Each new piece of equipment,  each rearrangement to facilitate a better sewing experience, and I’m so darn proud of myself!

This is my latest project.   I’m making an ironing table!  I’m mostly following Elizabeth Hartman’s tutorial, and it’s going to be great.  I’m going to attach those non-skid things that go under rugs to the bottom of my board so that I can lift it off and still use the table top for cutting if I want to.  it will keep me from hogging the dining table when I have something big to cut.

I’ve got a complete sewing experience nicely wedged into a 9 x 10 room.  With the plan to move my ironing surface into this corner, I’ve got a dedicated design wall behind me, and I don’t have to put my ironing board in front of it.  One thing I’ve already learned is that the ironing table must be pulled away from the wall so that big pieces of fabric can drape down the back.  I’ll probably also move the items away from the left side so that fabric can fall on that side as well.  I’ll have to move my daughters drawings.  😦

image

Here’s my favorite part of the room.  🙂

Notice to my children, I love you all dearly but I am not giving up or moving my sewing room again – no matter what.  It took me a long time to get this room, and I’m keeping it.  🙂  (Is that too mean?)


An effort to make Pot Holder Loops – maybe a tutorial

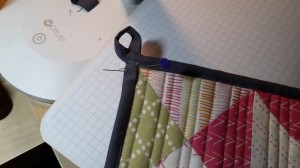
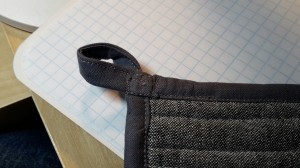
I like potholders with loops because they can become kitchen decoration as well as a useful kitchen tool.  Because I’m a major worrier, I don’t like those little plastic circles that you can stitch onto the potholder.  The stitching could come loose and the potholder could fall onto a hot surface!  So I’ve been thinking hard about how to stitch a loop using the binding itself.  Here is my first effort.

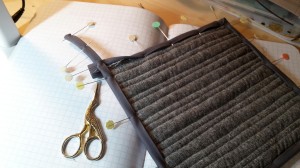
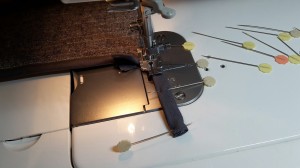
[Later]  I took a lot of photos, and captioned all of them with instructions.  1. The captions disappeared.  2. I don’t like my technique for making potholder loops.  And 3. I don’t have the energy or interest to recreate all of those captions.  So I’m going to add a few of the photos, and most of you will be able to figure out the general idea.  I’m already on my third effort to create an elegant pot holder loop, so I will try this tutorial again in the future.  But for now:

wpid-wp-1444269116534.jpg

wpid-wp-1444270504440.jpg

wpid-wp-1444272355918.jpgwpid-wp-1444271186290.jpg


wpid-wp-1444272924124.jpgwpid-wp-1444273256284.jpg

Calling it done.  🙂


Potholders – and new technology

  1. A few days ago I decided to make potholders as Christmas presents.
  2. I decided to be spontaneous and use all of a 36 piece charm square packet I purchased a few weeks ago from connectingthreads.com.  The packet was called “Good Neighbors”.
  3. I threw caution to the wind, and didn’t use a pattern!

So here is the result.

I started Saturday morning at the PMQG Sew Day and after much rearranging, I like what I’ve got.  (Thank you to Laura, last name unknown, for your help!)

They are bright and happy, and I hope they fit well into the receivers’ kitchens.

The charm pack made eight potholders.  Onto a large piece of backing, I placed one layer of Insul-bright and one layer of 100% cotton batting.  Pinned all of the potholders down and then straight-line quilted with a walking foot.

The charm pack made eight potholders. Onto a large piece of backing, I placed one layer of Insul-bright and one layer of 100% cotton batting. Pinned all of the potholders down and then straight-line quilted with a walking foot.

The backing is a dark gray essex linen-blend.

Almost forgot. The new technology part is the WordPress app that I just added to my phone and which I’m using to create this post. It’s encouraged me to make a post to my blog which is long overdue. But I’m having a lot of difficulty posting and captioning the pictures. So I’ll save my draft – and finish it on the main computer. And probably not with my new Windows 10 laptop either, which I’m also having difficulty understanding. It’s amazing how much time technology can take away from sewing!

My first Improv effort

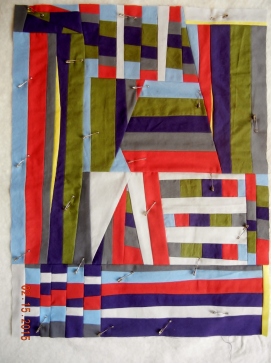
I took a class last fall from Kristin Shields through the Northwest Quilters Guild.  The class was ‘Improv solids’ and while it was fun and Kristin was a great teacher, I didn’t really like what I had created.  It languished as a UFO.  Six months later, the Portland Modern Quilt Guild is encouraging monthly mini-quilts to build our skills.  It’s a good time to force myself to finish my Improv Solids piece.  It took some un-sewing, and I have some leftover bits that just didn’t fit anymore, but now I love it!

DSCN3378 (764x1024)

about 15 x 24 inches

One of the things I love about improv quilts is the many points of interest they can create.  The eyes get little gifts as your vision travels around the quilt.  At the workshop, one of the participants showed a piece she had made at a previous workshop, and I loved it so much I still think about it.  Hers was soothing, very subdued colors, but with little gems of color and interest.  I wish I could see it again!

So I hope that my little quilt has achieved something close to that level.  At least as I finished it at 1am this morning, I was very happy with it.  My eyes enjoy it.  🙂

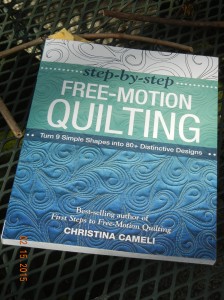
DSCN3374 Now I’m pondering how to quilt it.  I went to a book signing last night for Christina Cameli’s new book, Step-by-Step Free-Motion Quilting.  I really enjoy her book, and the event was fun as I’m getting to know more people in the Portland quilting world.  So I found people to talk to.

Christina’s book uses simple motifs to create what I’ll just call pretty patterns.  I’m sorry if the word is trite, but I think they’re pretty.

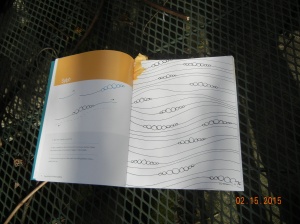
I’ve skimmed through the book and found six that I think would work to quilt my mini improv.  I want to do an all-over pattern because I want to have it done by Thursday night’s PMQG meeting, and I have limited time and patience.


DSCN3376Here is one of the patterns I think might work.  Most of the designs I chose are long lines with circles.  Christina recommends to draw the pattern on paper first to get used to how the pattern moves from one motif to the next and how it is used to fill space.  I haven’t done that before (the impatience issue), but I’ll be trying it this time.

Any suggestions for quilting?

Also, every time I make a mistake or two.  The mistake this time was trimming the quilt to its finished size before I had quilted it!  Rookie mistake.  I was too anxious to see it without all the hanging bits left over from the improvisational piecing.  I wonder how much trouble this will give me as I quilt it.  😦

Isn’t she the cutest!? and there’s a quilt too.

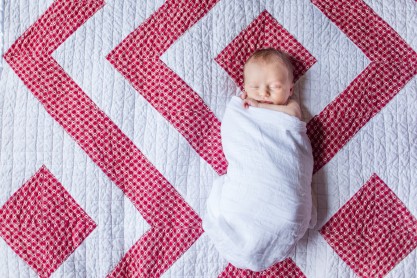
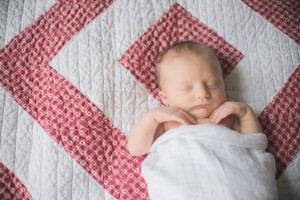
Be prepared because my grand niece might be the cutest baby ever!  I know, I know.  Everyone says that, but she’s really, really cute. And seems to sleep a lot. My niece sent these lovely photos of Collette sleeping on the baby quilt I made for her. So here are the photos.

DSC_0125-9-X3

I want to keep gushing!  But I’m forcing myself to stop.  DSC_0126-10-X3

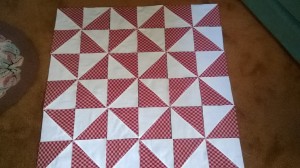
Here’s a bit about the baby quilt.  The front used some sweet old-fashioned fabric found in my Mom’s stash (red-checks with little hearts) and Kona white.  Half-square triangles, asymmetry, blah, blah….  The back is a shirting flannel which I love to use for baby quilts.  It’s soft, and they love it.  The binding is flannel backed satin.  Also soft and babies love it.  The flannel backing on the satin makes it easier to sew with, and that’s why I search for it.  For some odd reason, I had a hard time finding it.  And I still haven’t found it in the quality of olden days.

This was theDSC_0127-11-X3 2nd baby quilt I’ve machine quilted, and while I made numerous mistakes, I begin to see a glimmer of light.  And I’ve learned all kinds of things – like what to do if you free motion quilt a big fold in the backing.

Funny story:  I was really looking forward to a peaceful airplane ride where I could listen to my book on tape and sew down the binding on Collette’s quilt.  Everything packed up – thimble, needles, finger condom [ah, I mean finger ‘cot’], small scizzors, and the quilt.  Do you see the problem?  I opened up my little sewing kit and – no thread.  Very disappointing.  😦   I ended up sewing the binding down at my parent’s home, running it through the washing machine at the last minute, and delivering it wet.  But she still liked it after it was dry.

DSC_0128-12-X3

Last photo of Collette.  She’s about six lbs in these photos.  She’s 2 weeks old and she was 3 weeks early, so she’s tiny but strong!  Did I mention how cute she is?

Around the World Blog Hop

I like the asymmetry of this design combined with the simplicity of the colors.

I was very kindly invited by my friend and fellow blogger, Claire at KnitnKwilt, to participate in a blog hop.  Claire has a great blog covering a variety of topics all of which are interesting to me – quilting, design, books, and Portland.  All good things so please check out her blog!  In turn, I’ve invited Debbie Scroggy, local long-arm genious to share her blog, AllQuiltedLLC.  Debbie is an amazing designer and has won awards for her long-arm quilting right out of the gate.  She also did the quilting of my quilt, Zen Umbrellas.

This is my first blog hop but apparently the key is a series of questions that everyone answers.  You can read back through the blogs and see a wealth of responses on how we feel about our art.  The following are my responses to the questions.

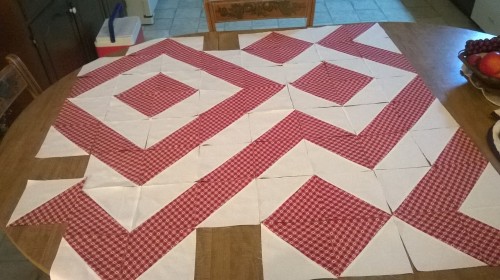
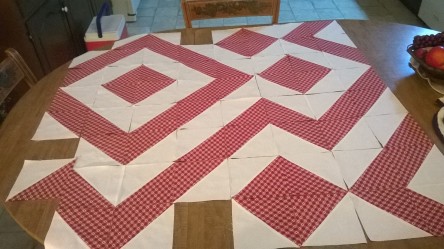
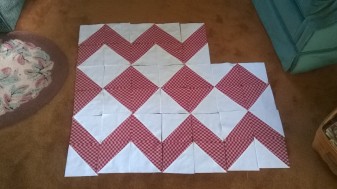
  1. What am I working on? Right now I’m working on a red & white baby quilt for my niece Taylor who is expecting in January 2015. I’ve wanted to design a quilt using half square triangles to make asymmetrical chevrons, and I’ve wanted to make a red & white quilt, so the two got merged in a baby quilt. Here is a photo of the layout I chose – along with some that I considered.
I like the asymmetry of this design combined with the simplicity of the colors.

I like the asymmetry of this design combined with the simplicity of the colors.

Red-White, center blocks

Red-White, pinwheels1
Pinwheels, or stars depending on your perspective. This one was definitely too ‘busy’ for me.

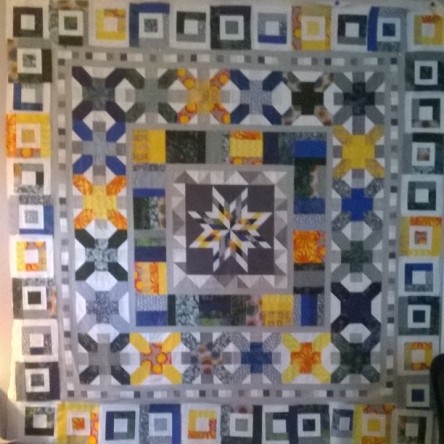
I’m also working on the Aviatrix Medallion quilt-a-long from Elizabeth Hartman. I’m on the final border, but I want to expand it to queen size so I’ll be working on it a while longer. Here is the last photo I took of that quilt showing border 5 (the next to last border) laid out.

Poor quality Instagram photo,#aviatrixmedallion, but you get the idea.

Poor quality Instagram photo,#aviatrixmedallion, but you get the idea.

2. How does my work differ from others of its genre? I don’t know that it does differ. What I do know is that I’ve got a lot to learn about color. I struggle with getting enough variation in my fabric selections. I take chances on color combinations that I later regret. But I like taking chances and failing more than going a safe route that doesn’t break any new ground for me.

3. Why do I create what I do? I’ve been quilting for over 25 years, but only sporadically. A few years ago, I knew I needed more creativity in my life and it didn’t take long to decide on quilting as my medium. Since then I’ve been working very hard at quilting. I now have what my husband calls my ‘woman cave’ and others might call a ‘sewing studio’. I spend a lot of time in there. The challenge is going to be fitting my husband into my quilting life! I also feel this sense of urgency to make quilts for each of my children and for my nieces and nephews. So much to do!

4. How does my creative process work? Hmmm. Mostly I look at photos of quilts and see things that I admire. I borrow magazines from the quilt guild and books from the library. This all gels in my brain till something bubbles to the surface that I just have to try. I haven’t historically followed a particular designer or pattern – I prefer to design something that I can call my own. The current Aviatrix Medallion quilt is an exception.  Folks following the quilt-a-long can post their work on Instagram, and it’s been fun to see the effect of the various color selections.

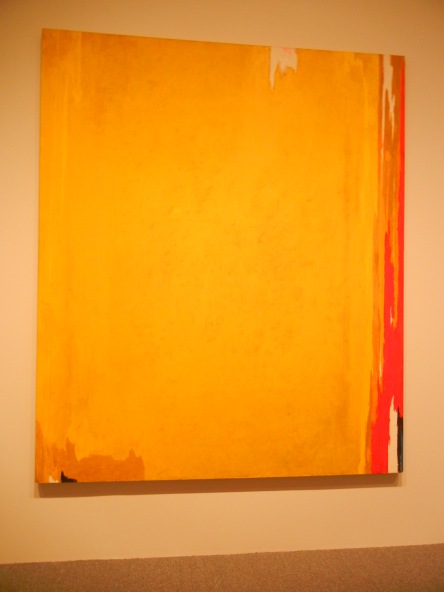
Here is an example of my creative technique: In June 2012, I had started to reconnect to quilting, and I had pieced a mostly traditional quilt for my son. I was seeing quilt patterns everywhere. My youngest daughter and I were in DC being tourists, and we went to the Hirschhorn, the Corcoran, and the Smithsonian Museum of Modern Art among many other wonderful places. I took lots of photos of things I found inspiring. The following painting in particular has stayed in my mind, and recently I knew that it would develop into a quilt in the very near future. I’ll have to look up the artist. Does anyone know who painted it?

I remember this painting to be a little different than this photo, so maybe my brain had already started to redesign it into a quilt!

I remember this painting to be a little different than this photo, so maybe my brain had already started to redesign it into a quilt! But isn’t it cool!

Thanks for reading my words, looking at my photos, and please visit Claire and Debby!

Photo editing – ethics?

I improved the color and contrast on one of the photos I entered in a recent quilt contest.  Do other quilters do the same?  My quilt photos had been looking washed out – dull colors, flat light, boring.  I’m not a trained photo editor, but even I can see some intriguing options in Microsoft Office Picture Manager – color, brightness and contrast, auto correct!  I increased the contrast, and slid one of the icons from side to side until my color looked more true to life.

But was I cheating?  I read a later post by another contestant lamenting that her photos didn’t look as good as the real project.  I thought about giving her a tip about using Picture Manager, but I’m trying to stop myself from telling others what to do.

Here are two photos.  One has been touched up, the other hasn’t.  It makes a big difference!

petals, edited

This photo has been enhanced, probably too much since the orange isn’t really that bright.

This is the original photo.

This is the original photo. Obviously not very good.

What do you think?  What do you do?  Do those who have access to technology have an unfair advantage?  Is photo editing the steroid of the quilting industry?  Am I making a mountain out of a mole-hill?

Let me know what you think.  In the meantime, I think I’ll keep enhancing my photos.  🙂

Making the simple more difficult – a tea cozy case study

For a recent Michael Miller challenge, I made a tea cozy. I figured this would be cool as who else would make a tea cozy! (Someone did. And hers might, just might, have been nicer than mine.)  But I digress. This is a little post to show you how I made my tea cozy.

I measured my tea pot.  I did some calculations.  I thought long and hard about how to create the dome shape I was looking for.  I think my first thought would have sewn up as a cone.  Here is a photo of my pattern.
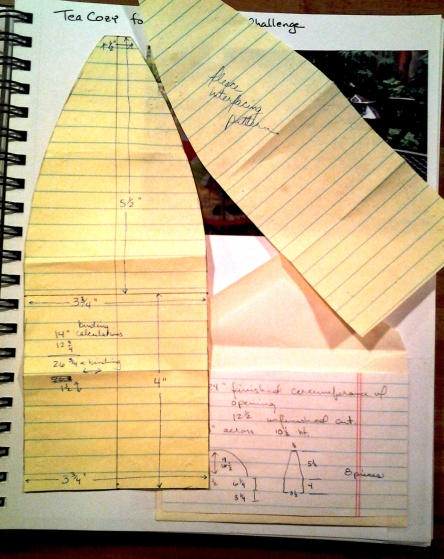
pattern, tea cozy 2014-08

I cut 8 petals of fabric for the outside and 8 petals for the lining. The cozy ends up being reversible.
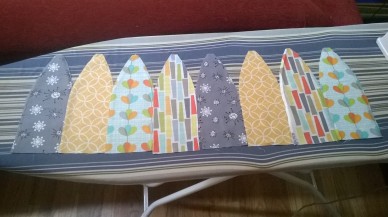
I cut 8 petals of fabric for the outside and 8 petals for the lining. The cozy ends up being reversible.

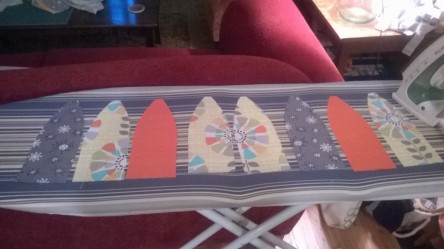
Here is the layout I used for the outside.

Here is the layout I used for the outside.

I cut 16 smaller petals out of a thermal lining material found with the interfacing at a fabric store.  I didn’t buy the one with the metal insulating layer because I was worried about how it would quilt.  I spray basted (505 spray) a lining petal to the wrong side of each petal, both the inside set and the outside set.  Then I sewed the set of 8 inner petals together along the long seam.  I left the final seam open.  Separately, I sewed the set of 8 outer petals together along the long seam.  This is about the time it became clear to me that I’d created a really difficult way to make a tea cozy.

I nested the inner layer against the outer layer, mostly matching up an inner petal against an outer petal, and I hand basted densely.  It looked like the photo below when I was about half way through basting.
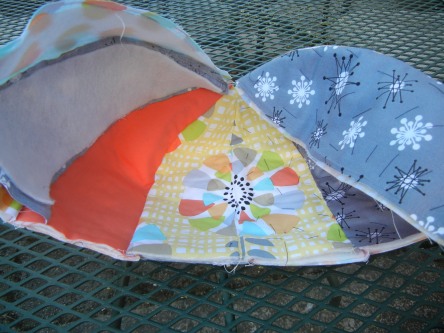
At this point, the inner petals are nested against the outer petals and some petals have been basted.

At this point, the inner petals are nested against the outer petals and some petals have been basted.

I left the one side open so that I could machine quilt the two layers together.  That looked like the following photo.

The machine quilting went fairly well despite the petals wanting to curl in.  I didn't quilt right up to the unfinished edge as I would need to sew this seam under and sew together.

The machine quilting went fairly well despite the petals wanting to curl in. I didn’t quilt right up to the unfinished edge as I would need to fold this edge under before sewing the final seam.

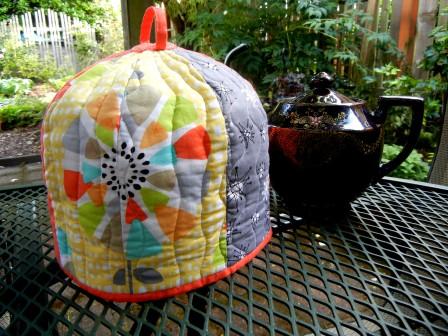
To sew the two edges together, I used a machine to sew a seam on one side and then flipped it over and carefully tucked the edges under on the other side and then hand-stitched that side together.  I forgot to take a photo as I was concentrating too much on making it work.  My hand sewn seam is not a consistent width as the petals weren’t perfectly lined up, but all in all it came out pretty well.  It wasn’t that difficult to do some final machine quilting over the last seam.  Here is the finished project, with the tea pot I measured in the background:
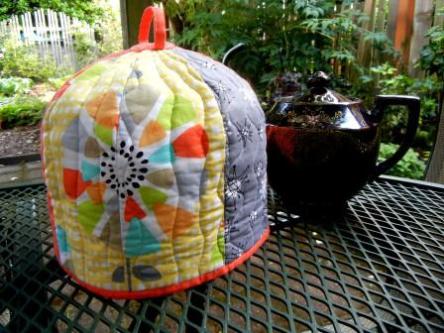
???????????????????????????????

I particularly like this view. Two petals were placed next to one another on the fabric and then cut out. They were able to maintain the integrity of the flower pattern in the fabric.

If you actually try to make this (and please let me know if you do because I want to meet someone as crazy as me!) you’ll find that there is a round hole at the top about the size of a nickel.  I made two small loops, hand tacked them down to the edges of the hole, then hand appliqued a small circle over the top to hide the edges of the loop.  One tip is to sew both the inside and the outside loops to the cozy before you do either the inside or the outside appliqued circle.  I had to do some un-sewing because of that little mistake.  Of course you can see that there is binding around the bottom edge.  No special trick needed for that.

One of the great things about this design is that it is fully reversible.  There are no rough edges anywhere and all of the polyester-type insulation is fully covered by cotton fabric.  There was something about having uncovered poly next to my steaming tea that bothered me.

I’m very content with my new tea cozy.  🙂  Here is a final photo showing the fully reversible nature of the cozy.
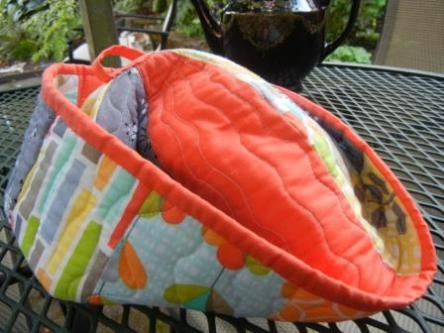
???????????????????????????????

FINAL NOTE:  Due to the dome style of this cozy, my children, the youngest of whom is 17, have taken to wearing the tea cozy around the house as a hat.